(measurements include seam allowance)
Pattern for L size (I have a 43" waist and am a D cup. The juban in the pictures is an inch smaller widthwise and 3.5" shorter. I have included modifications for a better fit in this tutorial):
body: 27" wide x 32" long rectangle, cut on fold with top of juban on fold (total measurement of juban body is 27" x 64").
Collar mating surface is cut as follows:
a) From the center, measure 2.75" in each direction at the top. Mark.
b) from the center at the bottom, measure 1/2" in each direction. Mark.
c) Mark two diagonal lines connecting each marking (top and bottom) on thier respective sides.
d) Cut along markings, cutting the back of the collar right on the fold.
collar: 7" wide and 64"long
sleeve: 15" wide and 42" long cutfoldfind
Loop part that goes down back:
4" wide and 28" long
Step 1: press collar in half, press seam allowances on sleeves.
Step 2: serge around all edges except sleeves.
Step 3: press all remaining seam allowances to be rolled except collar seam allowance on body of juban - collar will not be rolled.
Step 4: machine stitch the lower seam on the sleeves as follows.
a) stitch wrong sides together, making a 1/4" seam.
b) turn sleeve inside out and stitch with right sides together, just beyond the edge of the seam that is now sandwiched in between right sides. leave enough so that when the seam is pressed, a small overhang hides the first seam (about 1mm on either side).
c) turn inside out again.
Step 5: hand stitch 1/4" rolled hems on sleeve edges. Blindstitch is preferable, I recommend pressing the seam allowances before stitching to ensure uniform seams and a pretty stitch - this part of the juban is the most visible.
Step 6: sew the adjustment panel. 1/4" hems (rolled or not, it's your preference) up the sides, then fold in half and stitch across every 3", backstitching at either end for reinforcement.
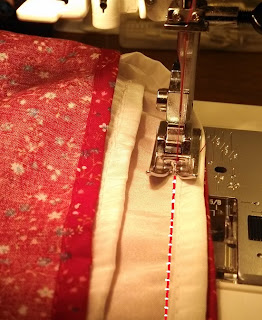
Step 7: Pin the collar in place. the shape of the collar does not come from the way the body of the juban is cut, rather from how you apply the collar. Make sure there are as few wrinkles as possible at the 'corners' of the collar. the collar should be sandwiching the fabric that forms the body of the juban like this:
| | |
|/ | \|
the diagonals represent the seam allowances that are pressed inwards. Your seam should pierce all five layers, two collar layers, seam allowances, and juban. Approx. 1/2" worth of juban will be extending into the collar. Take care not to twist the collar. Accurate and careful placement of pins is important to this process.
Step 8: Pin the adjustment panel in the center of the back between the outer layer of the collar and the juban.ensure that it is perpendicular to the collar.
Step 9: Sew the collar and the adjustment panel on.
Step 10: Hem all edges of the body of the juban. I use 1/4" rolled hems all around.
Step 11: Sew the sides of the juban closed, right sides together. Sew beginning approximately 10" down the sides of the juban, leaving an additional 2" open at the bottom for looks. This will leave an opening for your arm and a place to attach our sleeve. Reinforce all seams by backstitching.
Step 12: Attach sleeves as follows:
a) turn juban inside out.
b) with sleeves right side out, tuck the sleeve into the juban.
c) match the center tops at the shoulders.
d) stitch together just inside seam allowances 8" in each direction (for a total of 16" of stitching on each sleeve), either by hand or by machine. If using the machine for this step, ensure that the proper tension and needle has been selected for your fabric to avoid puckering/running/fraying.
Step 13: Tack outside edges of sleeves closed with a 1/4" long horizontal stitch, 10" down from the top center of the sleeve, using the same color thread as your sleeve. Backstitch.
There you have it! Your very own juban! An experienced seamstress can
whip one of these out in less than five hours!
If you would like more detailed pictures of any part just let me know - I still need to make two more of these so I'll be happy to take pictures for clarification if anyone needs them!


I love that you made your own. I know it's late but do you have more picture for clarification. I'm not a great seamstress and can't sew much so I need a video or tons of pictures to help me along
ReplyDelete